SSS Project Final Pieces!

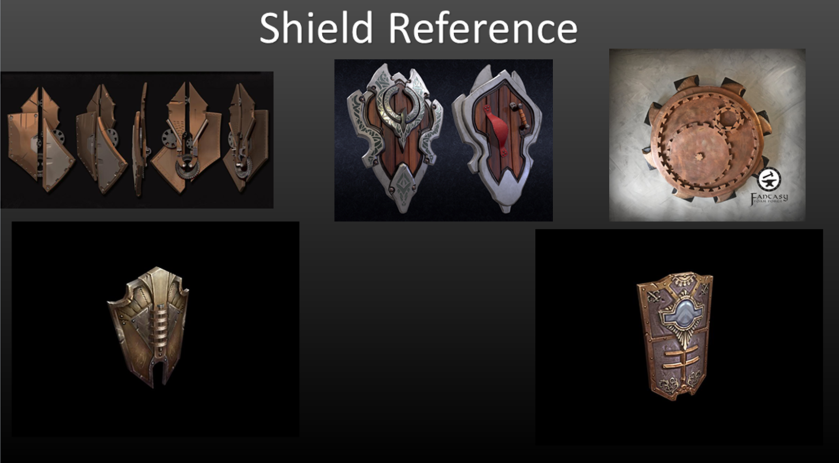
Over the course 3 months we have had to create a stylized shield and sword (SSS) for our portfolio at around June time. Over the whole 3 months of doing this project we have had to plan with moodboards, draw some sketches of things we wanted to create, model, unwrap our models and then texture them. The first thing that was needed at the start of the project was moodboards of pictures that may give inspiration towards the modelling or sketching process. Below are the two moodboards of potential sword and shield ideas.
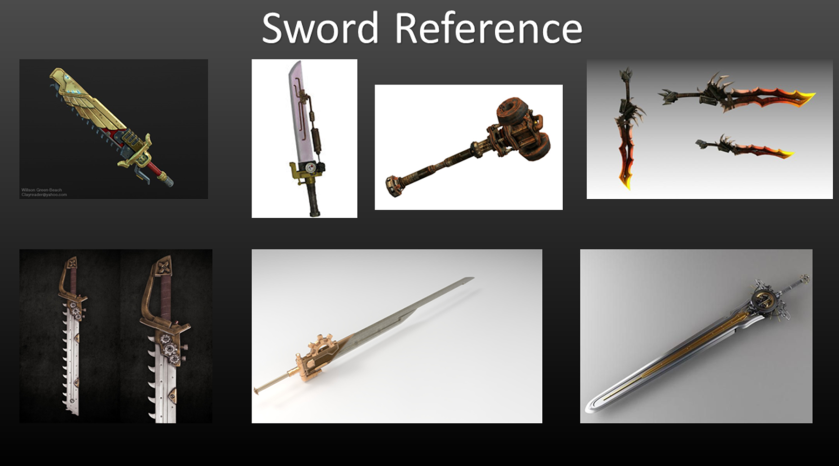
Sword Reference.png

Shield Reference.png

Then after this I furthered my progression in the project by doing some quick sketches which I would look at very closely to then go and choose which one of the designs that I feel I will be able to model and one that I really like the look of. Here are the sketches that I made for my sword (I did not draw any sketches for my shield).
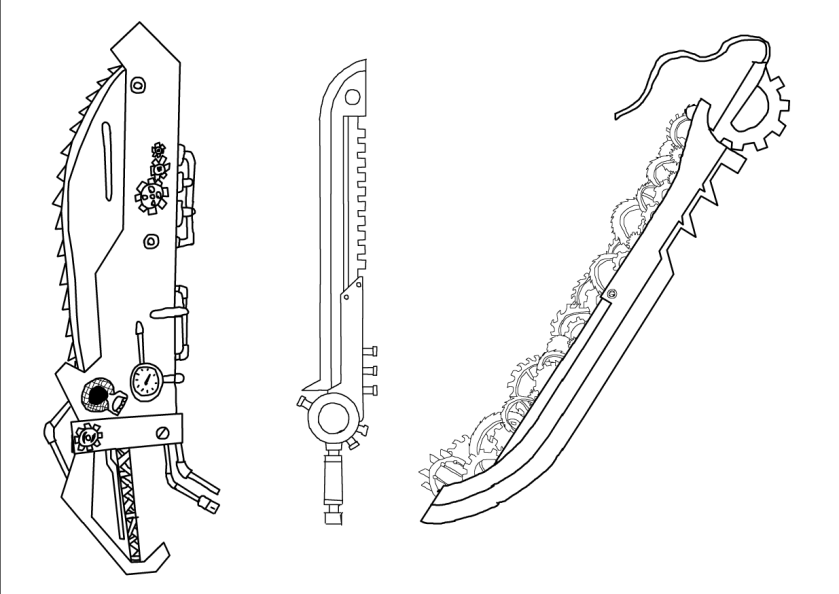
Sword.PNG

The photos above where really quick and simple drawings that I had some ideas of doing at the top of my head. In the end I decided on doing the one on the far left because I really liked the opportunity to make it very stylised and I also liked all of the random things that are on and around it. I am not saying that I wasn’t satisfied with my final decision but to make a potential better decision I could have looked around more for some stylised swords or I could have even experimented with searching for other types of weapons like axes, scythes or even spear like weapons.

From the concept of the sword that I had chosen (the one on the far right) you can clearly see in the final textured model I had adapted it a very small bit and that is because I felt like I really liked the way the concept art looked from the initial drawing so I decided not to change it much. However, one major change that I made actually determined the name of the sword and that was the addition of the flamethrower on the side of the sword which, when in combat, heats up the blade to deal extra damage to the enemy. In the end the addition of the flamethrower gave the sword the name of the ‘FireBlade’. Below is the final image of my sword model in the SSS Project.
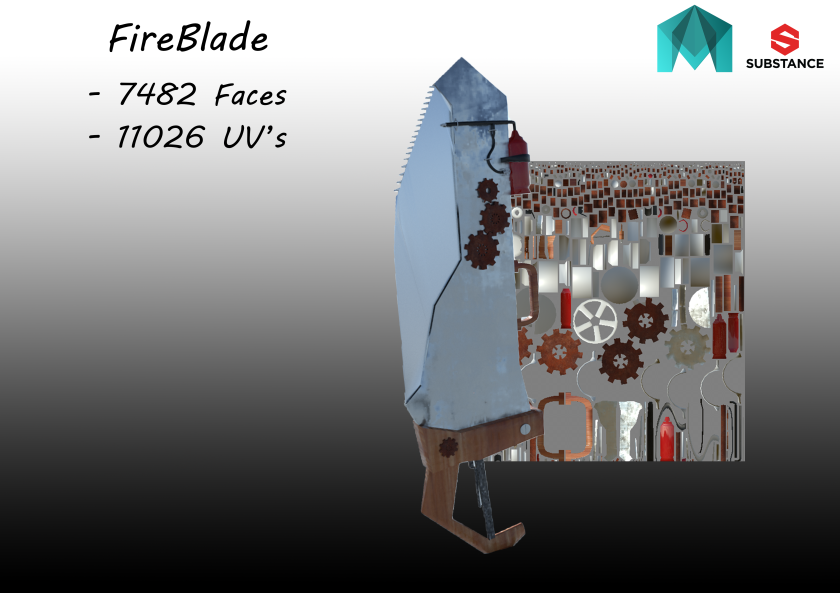
Sword Blog Picture.png

Then there’s the shield that I made with no concept art. The reason that I had not done concept art for it was because I started modelling random things on my computer at home and started to like the shape of a certain model that I had done so I just decided to roll with it and not do any concepts. Below is the finished model of the shield. (You may have seen this at the top of my blog).

Matthew's Blog

The shield model was made and then I put a steampunk touch to it by adding gears, bolts and gear shaped handles on the back. The shield was really fun to model because along the way of the long processes of modelling, unwrapping and texturing I learned a lot of things that I will undoubtedly use a lot in the future of modelling and texturing. Below is the final fully rendered and textured model of my shield.
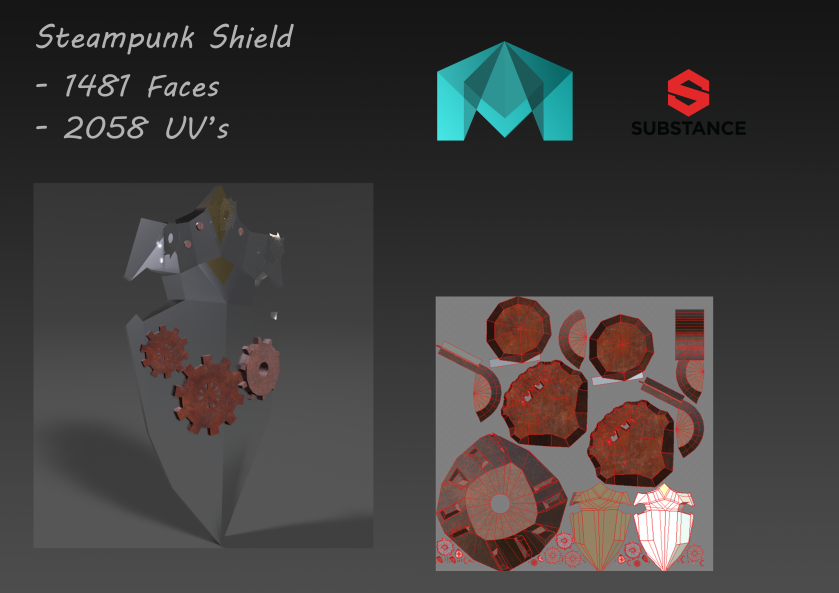
Shield Finished

At the end I am both happy and sad to have to end this project. I am happy because it means that I can go on to do more modelling projects (Low Poly Environments) but I am sad because overall it was a very fun and enjoyable project to work on.

That’s it for the SSS Project, It has been fun,

Matty OUT!


Low Poly Environment!

Last week in Ben’s we were introduced to a new modelling project in the form of a low poly environment this new project is there to see how we handle working with restrictions and to train us to work more effectively making sure the tri count isn’t over the limit. This project will definitely test my limits of modelling because I haven’t had to work with restrictions thus far into the course.

Originally the group that we formed consisted of Nath, Luke and Jacob however, Nath decided that he wanted to go solo and Jacob was “Let Go” so now it is just a duo project with me and Luke. We started off with deciding the theme for the environment. The two ideas we came up with were Castaway and Primal, in the end we settled with Castaway. After finding the right theme for us we went straight over to trello to dish out assets to each other and by we I mean all four of us but I will put the current asset list with just me and Luke on.

aw

After we gave each other things to do and settled on a theme the lesson was over and we couldn’t get anything started. Obviously, as you can see, there are completed assets there because me and Luke worked on assets outside of college on the Tuesday and Wednesday in which we were not in. Below you can see all of the assets that I have made.

And here is the current state of the Castaway Island with all of my assets in (currently none of Luke’s assets are in)

lowpoly.png

That’s all for now with the Low Poly Environment,

Matty OUT!

Walk Cycle Finished Product!

Today in Matt’s I finished off the animation and rendering part of my walk cycle. With the animation I animated things that I had not animated yet to make it more smooth e.g. Hands/Fingers and shoulders I really like how it has came along. I then sequence rendered my animation but we were told to cut off the last frame so it is a perfect loop when it becomes a video since the first and the last frame are exactly the same. Here is the current state of my walk cycle (Front and Side) before putting it in blender.


<p><a href=”https://vimeo.com/262470855″>Walk Cycle Front</a> from <a href=”https://vimeo.com/user72252699″>Matthew Dickson</a> on <a href=”https://vimeo.com”>Vimeo</a&gt;.</p>

Currently all I need to do now is to put it into blender, combine the two angles into a video and export it and that will be the end of the walk cycle.

That’s all for now with Animation,

Matty OUT!

(Its time to get funky)

Final Character Design!

Today in Tony’s we were told that we are going to be designing our final character to make with Matt in the future. However, instead of just making any character that may be on our minds we were given a genre/topic to base it on… Symbiosis.

What is Symbiosis?

Symbiosis is the interaction between two different organisms living in close physical association, typically to the advantage of both, also known as a mutualistic relationship. A mutualistic relationship is when two organisms of different species “work together,” each benefiting from the relationship. One example of a mutualistic relationship is that of the oxpecker (a kind of bird) and the rhinoceros or zebra. The oxpeckers get food and the rhinoceros or zebra get pest control.

To make my character I will need to do some research on what exactly I wanted. I instantly thought of something half animal half mech but I thought that instead of that I will just do two animals combined because it makes more sense in the topic of symbiosis.

I loved the idea of having an animal in a turtle shell so that is what I went for in the research process.

Image result for combined animal drawings

Image result for combined animal drawings


I have started to draw a lizard (Komodo Dragon) with a shell on its back. So far I have the shell and the head done and I am looking to get the full character done in the near future.

(I do not currently have the screenshot of the drawing but I will get it up as soon as possible)

That’s all for now with Character Design,

Matty OUT!


OneTwoThreeGame!

On Monday in Ant’s lesson we spent our time preparing for the programming exam in April. The game that we made is a game in which a random number is generated and a player is required to add either 1, 2 or 3 to their current number to make up the target number. For example the players number is four and the target number is seven they will have to add three to continue the game and if they add one or two they will receive a “Game Over!” screen and will have to restart. Below you can see how the game works when put into Unity.

ssss.gif

The game overall is very basic gameplay wise and art wise so instead of leaving it as a blank button clicking game in 2D space in unity I decided to add a basic font, a basic blue background and a “Time Elapsed” timer from my 2D Platformer game.

That’s all for now with the Maths and Coding Exam Preparation,

Matty OUT!

New Game Layout and Effectors!

A few weeks ago I decided to switch up the design for my 2D Platformer by changing the background to a lighter more noticeable colour and style. As you can see below I have attached two screenshots of my game one which is Before and one After.

Before

adwa

After

aadawdadawdawdawdw

As you can see the entire games art seems to have changed with just one change of the background art and personally I think that it has changed for the better. Also I have started adding water to the majority of the levels to give off more of a cave feeling since we have been learning about effectors with Chris.

Effectors

In total there are three types of main effectors they are: Platform Effector, Surface Effector and Buoyancy Effector.  These are all 2D effectors and as said in the name 2D effectors they can only be used in 2D games.

Platform Effector

Platform Effectors are a simple way of making a platform one way (you can jump up through but you can’t fall back down). This is the best use for this effector in my opinion.

Surface Effector

The Surface Effector applies forces along the surfaces of colliders effectively making whatever surface you want into a treadmill. These effectors are used mostly for replicating the motion of a conveyor belt/treadmill.

Buoyancy Effector

The Buoyancy Effector defines simple fluid behaviour such as floating or sinking it is there to add a water effect to any asset that you put into a 2D environment.

Below is the use of the Buoyancy effector in my 2D Platformer game.

d.gif

(Sorry for whatever happened to the right of the Gif)

That’s all for now with the 2D Platformer,

Matty OUT!

Matte Paintings!

Last week in Gary’s lesson we learned how to create matte paintings in Photoshop. I was happy when I was told that we would be learning how to create matte paintings because I am very keen to learn more techniques in Photoshop which I can use to improve my work.

In total I worked on two pieces after thinking of ideas that I could put onto a photoshop blank canvas. In the end I thought of two base ideas; an ocean setting and a space setting. I thought of the ocean setting first so that is what I started with.

Below is the starting image and the “end” product.

sea.jpg

Matte Paint #1

As you can see I added quite a lot of miscellaneous items that I found on google from a crashed plane to an island mansion to a whole city behind the island (the items definitely vary)! The big difference is the colour of the ocean, to change this I added an image fill and made it have a red tint to it to make it look like there is something dark to the island in the background. When creating this matte drawing I tried to make a story out of it which the view should be able to piece together. The main focal point that I want the viewer to see is the crashed plane which implies that whoever started this huge city in the middle of the ocean arrived in a plane which crashed there and you let your imagination go wild from there.

The other thing I did was in space and I can’t get the starting image but I can tell you that I started with a blank canvas of infinite space.

Below is the image.

Matte Paint #2

I didn’t have as much time on this as I did the other one but I think it still turned out pretty good in the end.

That’s all for now with Matte Paintings,

Matty OUT!

Character Designs!

Today, in Tony’s we were introduced to a program called Alchemy. Alchemy is an open drawing project aimed at exploring how we can sketch, draw, and create on computers in new ways. We were told to use the mirror tool and draw in a random motion until we got something that looked like a character. As you can see below I have made 3 characters that I really like the look of.

03 COW.png

01.png

02.png

After this we were told to draw an Adventure Time character in your own way or a friend as an Adventure Time character I decided to create a wounded Finn instead of doing the friend design thing. Below you can see a finished Finn.

Picture1

I really like this version of Finn even though I have not experienced this show personally. I think it is completely different to what the others did in the class. I started trying to make myself in an Adventure Time style but I accidentally removed an ear and I decided to make him wounded because I thought it would look cool.

In the end I am very happy how this turned out and I am looking forward to more character design drawings in the future.

That’s all for now with Character Design,

Matty OUT!

Walk Cycles!

Today in Matt’s we were told that we were going to be doing animated walk cycles. Right after being told what we are going to be doing for the next 4 weeks in Matt’s lessons (Walk Cycles) we were told to research Animated and Real Life walk cycles to gather reference to help us in the animation process. Below are the two walk cycles that I found.

Animated Walk Cycle:

Real Life Walk Cycle:

These videos will definitely help me with the animated walk cycle because the human walking video will show me the basic human movements to refine and base my walk cycle around it. It allows me to see how the feet move with the hips and the arms together in one motion. The Animated Walk Cycle also helps me out a lot because it helps me see the exaggerated style of the walk cycle and it opens up that window for me or I could do elements of both.

We were given a few models to animate our walk cycles. They were ranked from easiest to the hardest. During the lesson I decided to start the walk cycle with a harder rig rather than a ball with legs which was the easier option.


<p><a href=”https://vimeo.com/260268751″>Walk Cycle Playblast</a> from <a href=”https://vimeo.com/user72252699″>Matthew Dickson</a> on <a href=”https://vimeo.com”>Vimeo</a&gt;.</p>

That’s all for now with Walk Cycles,

Matty OUT!

Putting My Shield In Substance Painter!

Yesterday in Ben’s I finally, after a long process of UV unwrapping, started to texture my shield in substance painter. As you can see from the screenshot below I am going for the wood and rusty metal style.

shield.png

I started with the basics of adding a fill layer and a black mask and I started painting. I realised that it would be very hard to do it because it kept painting on surfaces that I didn’t want paint on but a friend of mine, Bailey, pointed out a tool which I had not heard of before that allowed me to paint on faces instead of painting freehand.

I hope to add more to the overall material of the shield, for example: I want to add some metal aspects to the main body of the shield to give it that extra bit of  a hard look to in but overall at the point that I am at at the moment I am happy with what I have produced and already it is the best asset that I have created and after UV unwrapping this and texturing it in Substance Painter I look forward to start on my sword.

That’s all for now with the Triple S Project,

Matty OUT!